More actions
John Hache (talk | contribs) Added instructions from carpentry room training |
Ttenbergen (talk | contribs) |
||
| (3 intermediate revisions by 2 users not shown) | |||
| Line 32: | Line 32: | ||
== Operating Procedure == | == Operating Procedure == | ||
# Remove the clamp and tension sign from the blade. | # Remove the clamp and tension sign from the blade. {{Discuss|Do we want to include instructions on where to put the sign to maximize chances of re-applying it and remembering to untension? }} | ||
# Apply tension to the blade using the tension lever. | # Apply tension to the blade using the tension lever. | ||
# Set the blade guard to slightly above the height of the workpiece. | # Set the blade guard to slightly above the height of the workpiece. | ||
| Line 38: | Line 38: | ||
# Prepare any safety devices (featherboard, push blocks, sleds for round pieces etc) | # Prepare any safety devices (featherboard, push blocks, sleds for round pieces etc) | ||
# Carefully feed the material through the saw, letting the blade do the work. | # Carefully feed the material through the saw, letting the blade do the work. | ||
[[File:Band Saw Tensioning V2a.jpg|thumb|400x400px|left]] | |||
<div style="clear: both"></div> | |||
== Shutdown and Housekeeping == | == Shutdown and Housekeeping == | ||
* | * Remove and store fixtures and safety devices | ||
** Featherboards and push sticks are stored on the wood room peg board | ** Featherboards and push sticks are stored on the wood room peg board, and some with magnets on the top of the body of the band saw. | ||
* | * Wipe outside of saw (table, fence, handles) with a brush | ||
* | * Check dust collector tube for debris/clogs | ||
* | * De-tension the blade and clamp the warning sign to it. The blade can be damaged if you do not de-tension it. | ||
* | * Sweep the floor around the band saw, miter saw, and table saw | ||
* | * Turn off the equipment and dust collector | ||
* Turn off the main exhaust if you are the last one in the room | |||
** Turning off the exhaust will turn off all equipment in the room. | |||
Latest revision as of 09:21, 2024 July 26
Purpose[edit | edit source]
The band saw has a vertical blade. It is used for:
- Ripping rough lumber that does not fit on the jointer
- Cutting freehand curves (limited by the depth of the blade)
- Resawing (cutting boards to different thicknesses)
The Laguna bandsaw is equipped with a carbide blade and can be used for resawing; the carbide blade must be de-tensioned after use to prevent warping.
Safety[edit | edit source]
Do:
- Check that the fence is square if required
- Make sure the blade on the large band saw is tensioned before use and de-tensioned after use
- Lower the guard so it is close to the workpiece before starting
- Ensure the blade is fully stopped before leaving the area
- Check beside the blade for trapped debris when done
Do not:
- Cut round workpieces without a sled or fixture
- Attempt to change the blade without prior training
- Let fingers come close to the blade - use a push stick if required, especially at the end of cuts
- Leave the equipment while the blade is still moving - the band saw blade takes a long time to slow down without the brake
- Use excessive force - let the blade do the work
- Continue working if you notice sparks from the guard - you may be pressing too hard, or the guard guides may need to be adjusted
Emergency Stop[edit | edit source]
The band saw can be stopped by pressing the stop button and applying the foot brake (on the right side of the equipment).
Operating Procedure[edit | edit source]
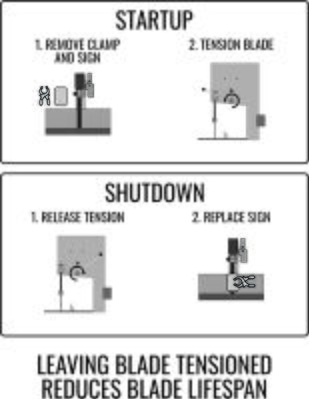
- Remove the clamp and tension sign from the blade.
- Apply tension to the blade using the tension lever.
- Set the blade guard to slightly above the height of the workpiece.
- Set the fence if required - note that fence may not be square by default and may require shims. Consult trainer or manual for assistance.
- Prepare any safety devices (featherboard, push blocks, sleds for round pieces etc)
- Carefully feed the material through the saw, letting the blade do the work.

Shutdown and Housekeeping[edit | edit source]
- Remove and store fixtures and safety devices
- Featherboards and push sticks are stored on the wood room peg board, and some with magnets on the top of the body of the band saw.
- Wipe outside of saw (table, fence, handles) with a brush
- Check dust collector tube for debris/clogs
- De-tension the blade and clamp the warning sign to it. The blade can be damaged if you do not de-tension it.
- Sweep the floor around the band saw, miter saw, and table saw
- Turn off the equipment and dust collector
- Turn off the main exhaust if you are the last one in the room
- Turning off the exhaust will turn off all equipment in the room.

